Sour Cream Chicken

The protein of choice in our home is more often than not chicken breasts.  Here in the UK, they are relatively in-expensive when compared to the red meats, and I find they provide a beautiful blank canvas for just about any other favour you want to put with them. 

Because there are only two of us to feed I usually buy free-range organic chicken when I can, and corn fed RSCA approved if I can find it.  I want to support a more humane method of chicken production as much as I am able to.

It breaks my heart whenever I think of any animal, destined for our plate or not  . . .  being mistreated or treated in any inhumane way and I strongly believe that one day we will all be held accountable for how we treated these precious gifts we have been given.

Meat was given to man for eating . . .  but I believe it is a gift which comes with a responsibility.

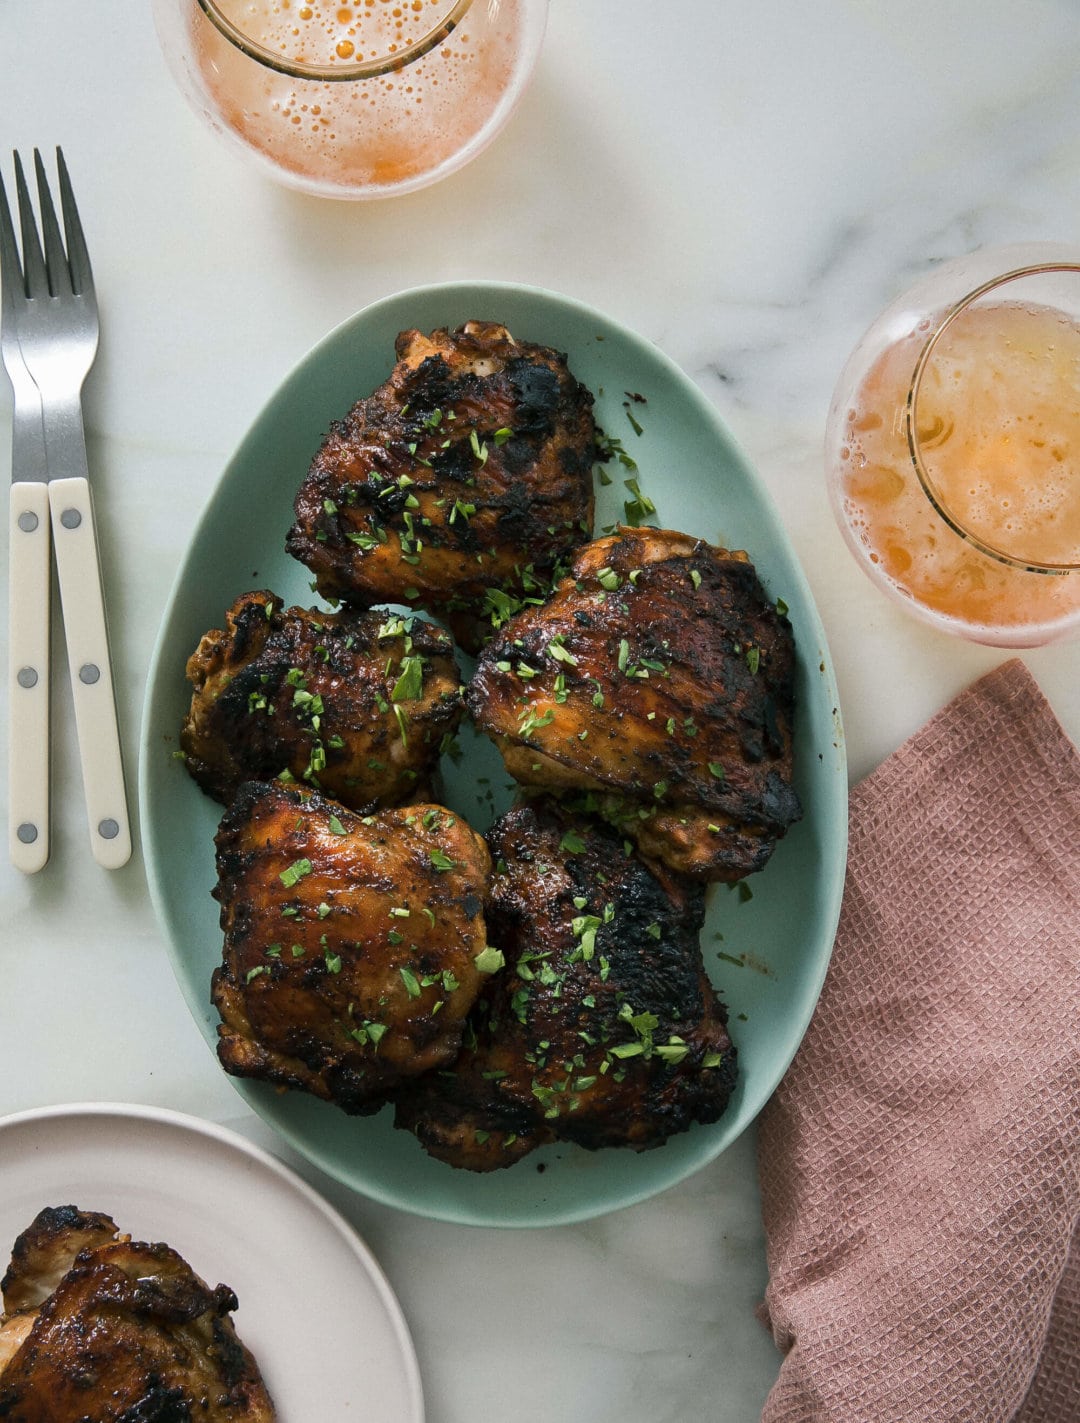
This recipe today is a fabulous way of cooking boneless, skinless chicken breasts.  I am not sure how it works, but the chicken ends up very tender and delicious.

It is so easy to destroy chicken breasts by over-cooking them.  Anyone who has eaten an overcooked, dried out, tough chicken breast knows exactly what I am talking about.

I don’t understand how that happens . . .  especially when they are one of the simplest and easiest things to cook.

Bone and skin definitely add flavour to meat, and also help to prevent it from drying out . . .  in the case of boneless, skinless chicken breasts, you don’t have those luxuries to rely upon.

Careful timing and the addition of layers of flavour are your friend.  In this dish the flavour comes from a tasty layering of textures and flavours  . . .  first the chicken, then a layer of cheese  . . . I used strong cheddar, but you could also use mozzarella or Swiss, or even Jack. (Pepper jack would be great!)  On top of that goes sour cream which has been stirred together with some herbs and seasonings and Parmesan cheese.  Then finally an additional sprinkle of Parmesan . . .

This chicken always comes out tender, delicious and filled with flavour. You could use Italian Herb & Garlic seasoning rather then the herbs I have suggested if you wish.  You could switch the herbs over to Tex Mex flavours with chili powder, cumin, coriander  . . .  and a splash of hot sauce.  Its a very forgiving and delicious entree!

Yield: 4

Author: Marie Rayner
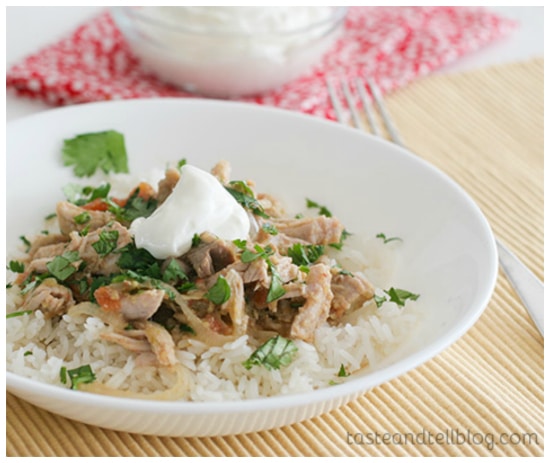
Print

With ImageWithout Image

Sour Cream Chicken

Not sure how it works, but this chicken ends up deliciously tender and filled with flavour.  Simply scrumptious.

ingredients:

  • 4 boneless, skinless chicken breast fillets
  • 4 slices of cheese (you can use mozzarella, cheddar, Swiss, etc.)
  • 120g sour cream (1 cup)
  • 135g grated Parmesan cheese, divided (3/4 cup)
  • 1 TBS cornflour (cornstarch)
  • 1 tsp dried basil
  • 1 tsp dried oregano
  • 1 tsp garlic powder
  • 1 tsp onion powder
  • 1/2 tsp each salt and black pepper
  • chopped parsley to garnish

instructions:

  1. Preheat the oven to 190*C/375*F/gas mark 5.  Butter a rectangular baking dish.
  2. Whisk together the sour cream. 90g of Parmesan (1/2 cup), cornflour, and all of the spices and seasonings.  Lay your chicken pieces, presentation side up in the baking dish in a single layer.  Top each with a slice of cheese and then smother with the sour cream mixture.  Sprinkle the remaining Parmesan over top evenly.
  3. Bake in the preheated oven for approximately 1 hour, or until golden brown and the chicken juices run clear.  Sprinkle with some chopped parsley to serve.

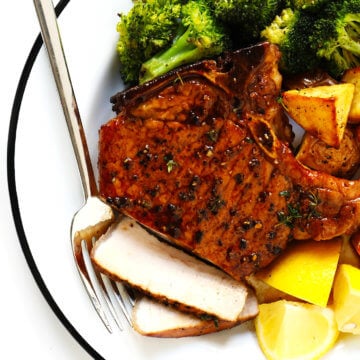
I served it simply with jacket potatoes that I scrubbed and popped into the oven to bake along side of the chicken, and a mixed salad.  How do you do your jacket potatoes?  I simply wash, dry, prick a few times with a fork and then throw them into the hot oven, right onto the oven racks.  The skins always come out beautifully crisp. I love them! 


Source: https://theenglishkitchen.blogspot.com/2019/05/sour-cream-chicken.html

Dunkin’ just added Beyond Meat to this popular breakfast item

Joining a growing lineup of fast food chains such as Burger King, Little Caesars, White Castle and Carl’s Jr., Dunkin’ has added plant-based imitation meat to its menu. Dunkin’ (no longer Dunkin’ Donuts) partnered with Beyond Meat to create the Beyond Sausage Breakfast Sandwich. The trendy breakfast item is available at 163 locations across Manhattan, and will soon be rolled out nationwide.

The Best Coffee Chains in America

The Beyond Meat Sausage patty is meant to mimic Dunkin’s savory breakfast sausage patty, and Beyond Meat custom-designed a spice blend specifically for the chain. The patty is made with 100 percent plant-based ingredients and provides an environmentally friendly alternative to meat. Dunkin’ is the first U.S. restaurant chain to offer Beyond Meat in breakfast sausage format.

The sandwich itself is similar to other breakfast sandwiches, served on an English muffin with a Beyond Meat Sausage patty, egg and American cheese.

So no, this breakfast is not vegan. But according to recent data, a majority of people who order vegan meat options from companies like Beyond Meat or its competitor Impossible Foods are not actually vegans, or even vegetarians. Customers are interested in trying plant-based options, regardless of whether or not they eat meat sometimes. Apparently, these plant-based alternatives taste pretty good, so they may soon be a part of one of the best breakfasts you can get in your state.


Source: https://www.thedailymeal.com/eat/dunkin-beyond-meat-breakfast-sandwich/072419

Baked Pork Chops

Baked Pork Chops

My favorite baked pork chops recipe — easy to make, nice and juicy, and easy to customize with your favorite seasonings.

Baked Pork Chops Recipe

Next up in our back-to-the-basics series this week about how to bake proteins in the oven — my go-to method for how to make juicy, tender, flavorful oven baked pork chops.

(Pssst, this one’s a bookmark-er!)

I don’t know about you, but pork has always been the most challenging meat for me to cook perfectly in the oven.  When cooked properly, a nice thick pork chop can be an incredibly delicious, tender, juicy, and versatile cut of meat.  But when overcooked — which can happen in a matter of seconds — pork regrettably becomes the meal that you’re going to wish was over, chop-chop.  Oof.  Nobody likes a dried out pork chop.

Here’s the great news though — it’s actually surprisingly easy to cook pork chops perfectly.  And since “the other white meat” happens to also be one of the most affordable and versatile and lean proteins at the store, it’s definitely worth the effort to learn!  All you need is this simple basic method plus a few important tips.  I’ll show you. 

How To Brine Pork Chops

Baked Pork Chops Ingredients & Kitchen Gear:

To make this baked pork chops recipe, you will need:

  • Thick-cut pork chops: When it comes to purchasing pork chops, there are three important qualities to look for that I highly, highly recommend:
    • Thick-cut: Ideally, between 1 to 1.5 inches thick.  Thick-cut pork chops much easier to cook correctly than their thinner counterparts.  If your grocery store only offers really thinly-cut chops, just go to the meat counter and ask if they can double-cut them (cut them a bit more thick) for you.
    • Bone-in: I much prefer bone-in pork chops (specifically, rib chops or loin chops) because they have the most flavor.  But if you prefer the leaner boneless pork chops, those will work too.  Just be extra-careful not to overcook them.
    • Fresh: Be sure to also buy the freshest pork that you can find.  In general, you want to look for pork that is a deep reddish-pink or reddish-purple color, not grayish or white.  And the fat should be white and creamy, not dotted with dark spots.  It should also be pretty firm, and not soft and squishy.
  • Olive Oil: Or whatever your preferred cooking oil may be.
  • Kosher Salt: An essential ingredient in our brine, and also to season the pork.
  • Seasonings: I typically like to use a simple garlic powder, salt and black pepper seasoning blend with pork.  And then serve it up with lots of fresh lemon slices, to brighten up the flavors.  But feel free to use whatever other dry seasonings you like.

You will also need (affiliate links included):

  • An oven-proof skillet: I absolutely recommend a cast-iron skillet (or a cast-iron Dutch oven) if you have one, which will hold heat and cook the pork more evenly.  But if not, any oven-proof skillet that can sustain high heat will do.
  • Tongs: These will be essential for flipping the pork as it is searing.  I recommend these 12-inch tongs from OXO.
  • An instant-read thermometer: I really feel like this is a must with this recipe.  A cooking thermometer is the best way to ensure with 100% accuracy that your pork is not over- or under-cooked.  And it is just as helpful with cooking many other proteins besides pork too.  I recommend this:
    • Instant-read cooking thermometer: which I have owned and used for years when cooking pork, which retails for about $9.99 on Amazon. (Only downside is that it cannot be used inside the oven.)
    • Dual-probe wireless meat thermometer: which I also own and love because it can be used inside of a hot oven (especially helpful for baking pork, salmon, steak and chicken), which retails for about $24.99 on Amazon.

Oven Baked Pork Chops Recipe

How To Make Baked Pork Chops:

As much as I would love to say that you can make perfectly baked pork chops by just popping them directly in the oven, I’ve just never had good luck with that method.  Instead, I’ve learned over the years that the secret is taking an extra 15 minutes (at least) to brine the pork.  Then giving it a quick sear on the stove before roasting it in the oven.  And then, as I mentioned above, using the help of a cooking thermometer to measure the internal temperature of the pork and ensure that it has reached the magical 145°F (62°C).  It may sound complicated, but I promise you — it’s easy peasy.  Simply:

  1. Brine the pork.  In a large mixing bowl, combine warm water and kosher salt (about 1 tablespoon per cup of water) and stir until the salt is dissolved.  Submerge the pork chops in the saltwater and soak for at least 15-30 minutes, or up to 4 hours.  Remove the pork chops and rinse them off with cold water.  Then pat them dry with paper towels and place on a clean plate.
  2. Season the pork.  Brush the pork chops on both sides with olive oil.  Then sprinkle with your desired dry seasonings.  (I like a mixture of garlic powder, kosher salt and black pepper.)
  3. Pre-heat your skillet. Meanwhile, as you’re seasoning the pork, heat your skillet over high heat for about 5 minutes, until it is super-hot.  Once your pork is seasoned and your skillet is ready…
  4. Sear the pork on one side.  Place the pork chops in the hot skillet (carefully, so that the oil doesn’t splatter).  Then give the tops of the pork chops a gentle press down with a spatula, so that the full bottom surface of the pork chops makes contact with the pan (instead of accidentally curving up).  Cook for 2-3 minute, or until the bottom of the pork chops are golden.  Then flip the pork chops over to the other side, and quickly…
  5. Transfer pan to the oven and bake.  Carefully use an oven mitt to move the entire pan to the oven, where the second side of the pork will continue to sear.  Then bake for 3 minutes, flip.  And continue baking for 3-5 minutes more, or until the pork reaches an internal temperature of 145°F (62°C).  Remove the pan from the oven, and transfer the pork to a clean plate.  Use a pastry brush to brush any of those extra juices in the pan onto the pork chops (that’s where so much of the flavor is hiding!).  Then tent the plate with aluminum foil and…
  6. Rest the pork.  Let the pork rest for 3-5 minutes, to lock those juices in.  Once the pork is ready to go…
  7. Serve warm!  And enjoy!

Once the pork has been baked, it can be stored in a sealed container in the refrigerator for up to 3 days.  Or you can freeze it for up to 3 months.  (<– I recommend shredding, dicing or slicing the pork before freezing for easier use.)

**Also, one important note — the pork chops will definitely be pretty smoky as they are cooking!  So be sure to turn on an exhaust fan above your stove (if you have one) or open a window.

The Best Baked Pork Chop Recipe

How To Season Baked Pork Chops:

Similar to chicken, pork does a brilliant job of adopting whatever flavors you choose to use in your seasonings. I’m a big fan of the simple garlic powder/salt/pepper mix in the recipe below, which goes with just about any cuisine.  But if you’d like to mix things up, feel free to sub in any of your favorite dry seasoning mixes, such as:

And of course, feel free to also toss the baked pork chops with your favorite finishing sauces as well.

Easy Baked Pork Chops Recipe

Side Dish Recipe Ideas:

Looking for some side dishes to serve with this baked pork chops recipe?  Here are a few of my faves:

How To Make Baked Pork Chops

Other Baked Protein Tutorials:

Be sure to check out our other baked protein tutorials here on the blog.  (More coming soon!)

Enjoy, everyone!

Did you make this recipe?
Leave a review »

Baked Pork Chops

My favorite baked pork chops recipe — easy to make, nice and juicy, and easy to customize with your favorite seasonings.

Ingredients:

  • 4 bone-in, thick-cut pork chops (ideally about 1 to 1.5-inches thick)
  • 2 tablespoons olive oil
  • 1 teaspoon kosher salt
  • 1/2 teaspoon freshly-cracked black pepper
  • 1/2 teaspoon garlic powder
  • optional: lemon wedges, for serving

Directions:

  1. Brine: To brine your pork chops, fill a large bowl with 1 quart of warm (not hot) water and 1/4 cup kosher salt.  Stir to combine until most of the salt is absorbed.  Add the pork chops and let them sit in the mixture to brine for 15 minutes.  Or you can also also cover the bowl and refrigerate for up to 6 hours.  Remove the pork chops from the brine, rinse with cold water, then pat them dry with some paper towels.
  2. Cook: Preheat oven to 375°F.
  3. Brush the pork chops on both sides with olive oil
  4. In a separate small bowl, whisk together the salt, pepper, and garlic powder until combined.  Sprinkle the mixture evenly on both sides of the pork.
  5. Meanwhile, heat a cast iron skillet (or oven-safe sauté pan) on the stove over high heat for 5 minutes.  Once the pan is super-hot, add the pork chops and use a spatula to press them evenly into the pan, so that the entire bottom surface of the pork chops makes contact with the pan.  Cook for 2-3 minutes, or until the under-sides of the pork chops are golden brown. Carefully use tongs to flip the pork chops.  Then use an oven mitt to carefully transfer the skillet to the oven.  Continue baking for 3 minutes.  Then flip the pork chops once more, and continue baking for 3-5 minutes more, or until the pork reaches an internal temperature of 145°F (62°C).
  6. Once the pork is ready to go, immediately remove the pan from the oven, and transfer the pork to a clean plate.  Brush any of the pan juices onto the pork chops.  Then loosely tent the plate with aluminum foil and and let the pork rest for at least 3 minutes.
  7. Serve warm.  Or, refrigerate in a sealed container for up to 3 days, or freeze for up to 3 months.

I first learned how to make these baked pork chops years ago using The Kitchn’s recipe, which I have adapted slightly since.

All images and text ©Gimme Some Oven

If you make this recipe, be sure to snap a photo and hashtag it #gimmesomeoven. I’d love to see what you cook!

Baked Pork Chops Recipe with Lemon, Roasted Broccoli and Potatoes

Cauliflower Fried Rice (Low-Carb + Keto)

This Cauliflower Fried Rice is a delicious way to eat more vegetables and tastes remarkably like the popular take-out dish. You can serve it as a vegan stir-fry, or bulk it up with a protein, like eggs or chicken, to make it a Paleo and Whole30 compliant dish.

cauliflower fried rice in a bowl

cauliflower fried rice in a bowl

Does Cauliflower Rice Taste like Real Rice?

Cauliflower rice is low in carbohydrates, but it is not quite as neutral in flavor as real rice. You can hide the cauliflower flavor with plenty of seasoning, though! In this case, the tamari (which is gluten-free soy sauce) completely masks the “cauliflower flavor” that some people aren’t a fan of.

Whether you typically like cauliflower or not, you’ll probably love this cauliflower fried rice. It’s fooled my dad and my husband into thinking they’re eating the real thing!

Pro Tip: You can ease your family into the idea of cauliflower rice by mixing it with real rice. I start with about a 50/50 mix, so that they get the texture of real rice, with plenty of veggies mixed in!

How to Make Cauliflower Fried Rice

To get started, you’ll need some cauliflower rice, which is simply raw cauliflower that has been pulsed in a food processor to create a rice-like texture.

cauliflower rice in a food processor

cauliflower rice in a food processor

Cauliflower Rice without a Food Processor

No food processor? You can also grate the cauliflower using a box grater for a similar effect. Check out this how to make cauliflower rice tutorial for a video demonstration.

cauliflower fried rice in a bowl with fork

cauliflower fried rice in a bowl with fork

Keep in mind that many stores now offer riced cauliflower in the fresh and frozen produce sections to help you save time and effort, too, though in my opinion freshly made cauliflower rice tastes a million times better.

Once your rice is prepared, making this recipe is quick and easy. You’ll just sauté the vegetables you plan to include until they are tender, then add in the cauliflower rice and seasonings at the end, because the rice will cook quickly.

If you need a vegan recipe, you can serve this veggie-based dish as soon as the vegetables are tender. It’s a great way to eat a TON of veggies all at once! For more protein, feel free to add eggs or high-quality meat. This recipe is very adaptable.

cauilflower fried rice in a stainless skillet

cauilflower fried rice in a stainless skillet

How Long Does Cauliflower Fried Rice Last?

I love eating these leftovers cold from the fridge, or reheated! Cauliflower rice starts to smell pretty bad after two days in the fridge, so that’s as long as I recommend storing this recipe. (Make sure it’s in an airtight container so your fridge won’t stink, either.) You can freeze cauliflower rice for up to 3 months in advance, but I recommend freezing it raw, because it’s softer when you thaw it later.

Cauliflower Fried Rice (Low-Carb + Keto)

This cauliflower fried rice is a delicious way to eat more vegetables, made with cauliflower rice and gluten-free soy sauce. It’s Vegan, Paleo, Keto, and Whole30 friendly!

Keyword: Cauliflower Fried Rice
  • 1 tablespoon olive oil
  • 1/2 yellow onion , chopped
  • 2 carrots , chopped
  • 2 celery stalks , chopped
  • 1 garlic clove , minced
  • 1 teaspoon fresh ginger , minced
  • 1 cup green peas (fresh or frozen)
  • 4 cups cauliflower “rice”
  • 1/4 cup tamari (gluten-free soy sauce), plus more to taste
  • 2 eggs
  • 1/2 teaspoon sesame oil (optional)
  1. Heat the olive oil in a large deep skillet, and saute the onion, carrots, and celery until they start to soften, about 5 minutes. Add in the garlic and ginger, and stir one more minute, just until fragrant.

  2. Add in the peas and cauliflower rice, along with the tamari. Stir to combine, then cover with a lid to let the vegetables cook until tender, about 5 to 8 minutes. Stir occasionally to prevent sticking, and feel free to use a splash of water to remove any vegetables that stick to the bottom of the pan.

  3. To add the eggs, use a spatula to move the cooked fried rice to the edge of the pan, leaving a well in the middle. Add a splash more oil to the center of the pan and then crack the two eggs into the middle of the pan. When you see them start to cook, use a spatula to scramble them in the middle, until cooked through.

  4. Mix the eggs into the rest of the cooked fried rice, and adjust any seasoning to taste, adding more tamari if desired. Serve warm. Leftover rice can be stored in the fridge in an airtight container for up to 4 days.

This recipe is easy to adapt to your tastes and preferences, too. If you’re vegan, simply omit the egg and add some crumbled tofu, instead. Prefer other veggies? Feel free to use whatever you have on hand! I think broccoli, snap peas, and mung bean sprouts would be the perfect addition for next time.

Cauliflower Fried Rice Nutrition (1 of 4 servings): Calories 174, Carbohydrates: 19, Fiber: 6, Protein: 10, Fat: 7

Recipe Notes:

  • If you’re making this recipe for someone who is gluten-free, make sure you use tamari, which is a gluten-free soy sauce. (Regular soy sauce contains gluten.)
  • If you need to avoid soy, try using coconut aminos as an alternative to the soy sauce or tamari.
  • Feel free to use any other veggies you have on hand. This recipe is very adapatable! If you only have dried spices on hand, I’d start with 1/4 teaspoon of dried garlic and ginger, and then add more to your taste.

If you try this recipe, please leave a comment below letting me know how you like it. And if you try a modification, please let me know how that goes, too. We can all benefit from your experience!

Reader Feedback: What’s your favorite way to serve cauliflower rice? If you haven’t tried it yet, you should also try my Mexican Cauliflower Rice Casserole and my Cauliflower Rice Jambalaya.

SaveSave


Source: https://detoxinista.com/vegetable-fried-rice/

Pollo a la Brasa-Style Grilled Chicken Thighs

Pollo a la Brasa-Style Grilled Chicken Thighs

Dinner, Summer

The grill has been my happy place the last few weeks. I decided it’d be a good idea to make some chicken in the flavor profile that is my absolute favorite: pollo a la brasa. This isn’t technically pollo a la brasa because it’s not cooked rotisserie style AND it’s cooked over a gas open fire not wood of any kind. I gotta keep it real, hence the reason why the word “style” is important.

Regardless this chicken is SO good. It is so flavorful and juicy and delicious. Thighs are already on the juicier side but when you marinate them in this combination of ingredients, you’re met with a chicken that is spicy (not too spicy!), a little ginger-y and absolutely delicious.

I marinated these overnight once and then the next time I made them, they only marinated for about 2 hours. Both times were bomb! So it’s really up to you! What does your schedule look like? It might be easier to have it marinate overnight.

Happy 4th of July!

Previous Post

You Might Also Like


Source: https://www.acozykitchen.com/pollo-a-la-brasa-chicken-thighs/

Three Tasty Recipes for Salsa Pork (Slow Cooker or Pressure Cooker)

These Three Tasty Recipes for Salsa Pork are all so delicious and Salsa Pork couldn’t be easier for a Taco Tuesday Dinner! It doesn’t matter whether you use the Instant Pot or the slow cooker to prepare this tasty Salsa Pork because I’m sure your guests will gobble it up and probably ask for seconds. 

Click here to PIN Three Tasty Recipes for Salsa Pork! 

Click here to see 20 Amazing Recipes for Slow Cooker or Instant Pot
Mexican Shredded Beef, Chicken, or Pork

Three tasty recipes for Salsa Pork featured on Slow Cooker or Pressure Cooker at SlowCookerFromScratch.com

These Three Tasty Recipes for Salsa Pork all begin with a different cut of pork: pork roast, pork chops, or pork shoulder. No matter which cut of pork you choose, or which recipe you choose, I bet one of these Salsa Pork Recipes will be just what you’re looking for! Salsa pork is such an easy dinner idea and something that would taste good any time of year.

Serve Salsa Pork on it’s own with a colorful green salad, serve over rice (or cauliflower rice for a low-carb option), or make tacos, burritos, enchiladas, or tostadas. The options for this tasty meat are endless so just let your creative juices flow and get cooking! And if you’re looking for a Taco Tuesday dinner for tomorrow, don’t you think Salsa Pork Tacos sound delicious?

All photographs here are copyrighted to the blog that posted the recipe. Just click the recipe title under any photo to see the full recipe on the original blog. And if you try one of these easy recipes for Salsa Pork please come back and tell us how you liked it!

Three Tasty Recipes for Salsa Pork featured on Slow Cooker or Pressure Cooker at SlowCookerFromScratch.com

Slow Cooker Salsa Pork from Taste and Tell sounds like an easy dinner idea. The boneless pork roast is trimmed and placed in the slow cooker, then it’s cooked in salsa verde and chicken stock with some onion, tomatoes and cumin.  When the pork pulls apart, the sauce is reduced on the stove and the flavorful pork mixture is served over rice with cilantro and sour cream to garnish as desired!

Three Tasty Recipes for Salsa Pork featured on Slow Cooker or Pressure Cooker at SlowCookerFromScratch.com

Instant Pot Salsa Verde Pork from Cooking with Curls is easy enough to fix any night of the week and is loaded with flavor. With just five ingredients and ninety minutes in the Instant Pot you can create this yummy Salsa Verde Pork that can be served in so many ways. Use it to stuff tacos, burritos. tamales or enchiladas; serve over rice or cauliflower rice, or top a colorful green salad. Sounds delicious!

Three Tasty Recipes for Salsa Pork featured on Slow Cooker or Pressure Cooker at SlowCookerFromScratch.com

These CrockPot Salsa Pork Chops with Cumin, Lime, and Garlic from Kalyn’s Kitchen are tender, Southwestern flavored pork chops in a sauce that is just slightly spicy. Made in the slow cooker these pork chops can simmer for several hours while you are busy doing other things. They are tasty served with a green salad or would be delicious with Spicy Mexican Slaw for a low-carb meal.

More Tasty Pork in the Slow Cooker or Instant Pot:
Use the Index Page for Pork to see all the slow cooker or pressure cooker pork recipes that have been featured on this site.

Three tasty recipes for Salsa Pork featured on Slow Cooker or Pressure Cooker at SlowCookerFromScratch.com

(Visited 194 times, 1 visits today)


Source: https://www.slowcookerfromscratch.com/slow-cooker-salsa-pork-from-taste-and/

DARK CHOCOLATE ROSEWATER CAKE POPS

DSC_6271

Cake pops! These little bites of heaven are the perfect treat for homemade valentines or for your Gal-entine’s party with your girlfriends. I also love the combination of rosewater and dark chocolate. Not only is it spot-on for Valentine’s Day, it also tastes lovely. The delicate rose flavor elevates the depth of the chocolate, and is a fun twist on simple chocolate. I personally find cake pops to be too sweet, so instead of using frosting I stuck with light and simple coconut whipped cream. It adds moisture without being too cloying. Full disclosure: They are a bit of a thing, so if you’re going to do it, commit and do A LOT. Also, invest in a block of styrofoam or a cake pop stand. It makes drying them a lot easier, and it’s such a pretty way to show off all of your work! 

DSC_6250

DSC_6247

DSC_6239

INGREDIENTS

For 3 dozen cake pops

1 9 x 13 inch dark chocolate cake, cooled

Click here for the recipe, though box cake is totally fine too

1 cup coconut whipped cream (recipe below)

2 teaspoons rosewater, divided

4 cups white candy melts, melted and divided into 4 deep plastic cups

pink food coloring

lollipop sticks

DIRECTIONS

Cut the cake into sections and crumble very finely into a really large bowl. The finer the crumbs, the less lumpy your cake balls will be. Add the coconut whipped cream, and sprinkle a teaspoon of rosewater over everything. Mix together thoroughly until the cake sticks together and is quite moist. Careful though, if it’s too moist, the balls will fall right off the stick. With your hands or a small candy disher, form 1-inch balls and set aside on a wax paper lined tray. Pop the cake balls in the fridge to set, about 30 to 60 minutes.

Meanwhile, get your coating ready. In the cups of white candy melts, add 0, 1, 2, and 3 drops of food coloring. Stir well to combine. Dip the sticks into any of the candy coating, and then pop them into the center of the cake balls. Let them set for a few minutes, so the cake balls don’t fall off of the sticks when you’re dipping.

Roll the cake pop in the candy coating with 0 drops, hold it for about 10 seconds; then dip the cake pop 3/4 down into the candy coating with 1 drop, hold it for about 10 seconds; then dip the cake pop in the candy coating with 2 drops 1/2 way down, hold it for about 10 seconds; then dip the cake pop 1/4 down into the candy coating with 3 drops, hold it for about 10 seconds to set. Lightly sprinkle the pop with white sanding sugar for a little sparkle, if you like, or decorate with candy pearls. Set the the pops in a pop stand or on a tray lined with wax paper, and hold in the fridge until you’re ready to serve. Take them out 15 minutes before you’re ready to eat to take the chill off.

INGREDIENTS (COCONUT WHIPPED CREAM)

Makes 3 cups

1 15-ounce can coconut milk

Full fat is necessary, I used Native Forest

1 tablespoon agave nectar

1 teaspoon vanilla extract

DIRECTIONS

Set the can in the fridge overnight so that the coconut fat solids separate from the coconut water.  Open the can and carefully pour out the thick coconut cream. With an electric whisk, beat the cream, agave, and vanilla extract on high until peaks form, about 2-3 minutes. If not serving immediately, place the bowl of whipped coconut cream in the fridge and then beat it again right before serving it.

<!–
–>


Source: https://www.thekitchykitchen.com/?recipes=/dark-chocolate-rosewater-cake-pops/

7 Ways Hydrogen Peroxide Will Help You Look Your Best

hydrogen peroxide

hydrogen peroxide

Of all of the household products I’ve written about over the years, hydrogen peroxide is definitely among the most useful of them! From cleaning to laundry to personal care, there’s not a lot that little brown bottle can’t do around the house. In fact, I talk about hydrogen peroxide so much that I even wrote a whole eBook about it! (Check out Hydrogen Peroxide Magic in my shop, or get it for free if you’re an OGT Plus member!)

But even though I’ve written quite a lot about hydrogen peroxide already, I’m still discovering new ways to use it. So I thought I would share some of those discoveries with you today! Check out these 7 ways you can use hydrogen peroxide for beauty, hygiene, and personal care. (You might already keep hydrogen peroxide in your bathroom cabinet for first aid purposes—and in that case, you won’t even have to change where you store it!) 🙂

Related: 35+ Uses For Hydrogen Peroxide You’ll Want To Know About


hydrogen peroxide

hydrogen peroxide

1. Fade Blemishes & Discoloration

You can use hydrogen peroxide to lighten acne scars, age spots, and other skin discolorations. Use a cotton pad to apply a thin layer of peroxide to the affected area. Let it sit for 10 minutes, then rinse with water. Over time this treatment will lighten those spots and make them much less noticeable.

hydrogen peroxide

hydrogen peroxide

2. Treat Acne

Acne forms when excess oil and bacteria get trapped in your pores. Hydrogen peroxide can help eliminate acne in two ways; it helps exfoliate the topmost layer of skin to expose new skin cells, and it helps kill the bacteria trapped inside your pores. Wash your face, then use a cotton pad to apply a small amount of hydrogen peroxide to acne-prone areas. Use sparingly, and follow up with a moisturizer.

hydrogen peroxide

hydrogen peroxide

3. Soften Heels & Eliminate Foot Odor

Hydrogen peroxide is great for treating all kinds of foot issues, including rough skin and odors! Just add equal parts hydrogen peroxide and warm water to a foot bath. Soak your feet in the solution for about 10 minutes to kill bacteria and soften skin.

hydrogen peroxide

hydrogen peroxide

4. Whiten Teeth

Hydrogen peroxide is one of the best whiteners and brighteners you can buy. You can even use it to whiten your teeth! Follow the link below to learn how to make a simple homemade teeth whitening treatment with hydrogen peroxide.

Related: This Easy Teeth Whitening Treatment Will Save You A Fortune

hydrogen peroxide

hydrogen peroxide

5. Clean Makeup Brushes

Even if you have the best skincare routine, you’re undoing all your hard work if you don’t keep your makeup brushes clean! Dirty makeup brushes can harbor all sorts of grime and bacteria that can clog up your pores.

Clean your makeup brushes by filling a small cup with equal parts hydrogen peroxide and warm water. Soak synthetic brushes in the solution for about 5 minutes. Then rise the brushes with clean water, and use a clean cloth to gently squeeze out any remaining water. Let your brushes air dry completely before using.

hydrogen peroxide

hydrogen peroxide

6. Brighten Discolored Nails

Some nail polishes can cause your fingernails to take on a yellow or orange hue. But you can use hydrogen peroxide to brighten your nails and remove discoloration! Apply a cotton ball soaked with hydrogen peroxide to each affected nail. Let them sit on the nails for a few minutes, then rinse clean. Follow up with lotion or a cuticle cream, as hydrogen peroxide can be harsh on sensitive skin.

hydrogen peroxide

hydrogen peroxide

7. Highlight Hair

Use hydrogen peroxide to add natural highlights to your hair! Add equal amounts of hydrogen peroxide and water to a spray bottle. Spray the peroxide solution on damp hair, then let dry to promote subtle, natural highlights.

What’s your favorite way to use hydrogen peroxide?


Source: https://www.onegoodthingbyjillee.com/hydrogen-peroxide-for-personal-care

Applesauce Bread

Need a simple old fashioned quick bread recipe? Applesauce bread is a simple quick bread that uses basic ingredients. 

Applesauce Bread

Old fashioned recipes are some of the best recipes to make. You know the kind I am talking about. The kind like many of our grandmothers used to make. 

They are the recipes that are simple. They use basic ingredients. You can make them anytime you need to because you almost always have the ingredients on hand. 

Applesauce Bread

Often times we look for new and updated recipes. We want something current and fun. But I think our mothers and grandmothers had it right when it came to most food and recipes. They kept it simple. 

I have no desire to go back to the days of using lots of margarine, Crisco, and lots of things that come in packages and boxes. What I am talking about is the basic foods that you make from scratch. The simple homemade recipes. 

Homemade food doesn’t have to be complicated. It can be easy to make and still be delicious. 

Applesauce Bread

Recipes like old fashioned applesauce bread are examples of that. Applesauce bread is easy to make and tastes so good. If you have never had it, it is kind of like applesauce cake, but in bread form. 

Applesauce bread is one of my favorite quick breads to make. My whole family loves it. I love that it can be used for breakfast, lunch, snacks, and dessert. 

I keep this bread simple and skip the chopped nuts since our family can’t have them, but if you can have nuts they would be really good added to this applesauce bread. 

Applesauce Bread

Can Applesauce Bread Be Made Into Muffins?

Yes, it can. Just bake in a prepared muffin pan for 18-20 minutes or until toothpick inserted into the center comes out clean.

Can You Freeze Applesauce Bread?

Yes, it freezes great. This is one of those recipes that is great to double or triple. Let it cool completely. Wrap well and freeze. You can also let it cool, slice it, and then freeze it in individual portions for easy lunches or snacks. 

Can I Make Applesauce Bread Gluten Free? 

Yes, it works great gluten free. Here is the recipe for my Gluten Free Applesauce Bread. I show you how I make it gluten free. 

Love Quick Breads? Give One of These A Try!

A simple old fashioned applesauce bread recipe.
Total Time 1 hour 10 minutes

Ingredients

  • 1 1/4 cups applesauce
  • 1 cup white sugar
  • 1/2 cup vegetable oil
  • 2 eggs
  • 3 tablespoons milk
  • 2 cups all purpose flour
  • 1 teaspoon baking soda
  • 1/2 teaspoon baking powder
  • 1/2 teaspoon ground cinnamon
  • 1/4 teaspoon salt

Instructions

  1. Preheat oven to 350 degrees. Lightly grease a 9×5 inch loaf pan.
  2. In a large bowl, combine the applesauce, sugar, oil, eggs and milk mix until well combined.
  3. Stir in the flour, baking soda, baking powder, cinnamon, and salt. Stir until smooth.
  4. Pour batter into prepared loaf pan.
  5. Bake in preheated oven for 60 minutes, or until a toothpick inserted into center of the loaf comes out clean.
Applesauce Bread

Originally published June 2008. 

<!– –>


Source: https://www.lynnskitchenadventures.com/applesauce-bread/

A ‘Why Didn’t I Think of That?’ Trick for Better Salads

We all know how to make a salad, right? Start with some leaves, add a few bonuses (chopped vegetables, roasted nuts, crispy croutons, you name it), drizzle with dressing, toss. That’s the everyday way.

And then there’s the Estela way.

Estela is a restaurant in New York City by Chef Ignacio Mattos. In 2013, the year it opened, The New York Times gave it two stars. Currently, it holds a spot on the World’s 50 Best Restaurants list. Which is to say, if you go to Estela, you’re going to get good food.

Think: spiced almonds and Iberico ham. Burrata with salsa verde and charred bread. Lamb ribs with charmoula and honey. Oh, and the most Why didn’t I think of that? salad you’ve ever had in your life.

For what it’s worth, it doesn’t look like a salad. It looks like a pile of endive leaves—maybe even a pile you recognize, considering that the dish is also the cover of Estela’s recently released, namesake cookbook.

“People associate us with this salad,” Chef Mattos told me.

After one or two bites, it’s easy to see why: If you dig your fork beneath the leaves, you’ll find all sorts of crunchy, cheesy clusters. Mattos calls it “granola,” but where you’d expect oats, there are actually sourdough croutons, toasted walnuts, and Ubriaco Rosso (an Italian cow’s milk cheese with a purplish rind), all dressed with a peppery anchovy vinaigrette.

It sounds good and tastes even better, which makes it all the more curious that Estela hides the granola at the bottom of the bowl. But to Mattos, that’s all part of the fun.

“It creates a surprise element and makes a statement by keeping the food simple yet bold,” he said. “The salad eats better when its plated this way—each bite is different.”

In the cookbook’s recipe headnote, he encourages readers:

The way to start is by eating a few of the top leaves, little endive cups holding orange juice and oil, and then begin filling the rest of them with the absurdly delicious crouton-and-cheese mixture hidden below, sort of like making your own taco.

And with respect to those hard-to-find ingredients? Mattos encourages substitutions, too. The Ubriaco Ross, he told me, can be replaced with blue cheese. The garnacha vinegar can make way for a red wine counterpart. And even the iconic endive can be swapped out for “radicchio or chicory,” he said, “anything that is fresh and alive to balance the granola’s richness.”

In other words? This dish is about as famous as a restaurant salad can get. But it’s also a template for salad assembly at home. Instead of tossing your mix-ins with the leaves, hide them beneath like buried treasure, and be sure to dress each component separately—either with the same vinaigrette, or take a cue from Mattos and mix and match.

Below is the recipe for Estela’s version. But I can’t wait to hear what upside-down salad you come up with on your own.

What’s your favorite way to make salads? Spill in the comments!

Source: https://food52.com/blog/23948-a-why-didn-t-i-think-of-that-trick-for-better-salads